How to Cook Soy Curls
Have you ever wondered how to cook soy curls? Well, you’ve found the right place! Now if you don’t know what soy curls are, you might be scratching your head… let me explain. Basically, they are a soy-based meat alternative that has a texture very similar to chicken. Manufactured by Butlers Foods, a family-owned company that’s based in Oregon, soy curls are made from boiling and dehydrating soybeans. The end results are dry, shelf-stable strips of vegan chicken that you simply rehydrate with water when ready to use.
WHY I LOVE SOY CURLS
What makes them most attractive to me is that they are only one ingredient (whole soybeans). They are also high in protein and very filling, in addition to having a great texture (if prepared correctly). This makes them my favorite vegan chicken option on the market! You can add them to soup, air fry them, or roast them. But my favorite way to prepare them is to toss them with a savory spice blend and pan-fry them until golden brown in a skillet. So that’s precisely what this blog post is all about. Please note: This post is not sponsored, I just love soy curls. I will include an affiliate link to them under ‘shop’ below in case you want to buy some to try (I prefer to get the 3 pack.)

Before we begin, I must address a few things that are working against soy curls. One is the name. It’s not very good, lol. If you mention to someone who is not vegan or vegetarian that you will be serving them something called ‘soy curls’… you might get a grumpy or sassy response. Second, they have to be prepared properly or they can taste flavorless and spongy. Just like tofu, soy curls are a blank canvas! This means if the wrong person gets their hands on them and they don’t know all of my tips and tricks, the end results could potentially be quite bland and the texture could be weird. Don’t be that person because no one will like you. I know… it’s a cruel world.

MY TIPS FOR HOW TO COOK SOY CURLS
Here is my best advice for cooking soy curls. The goal here is to turn them into the most delicious vegan chicken option. To do this, I’ve broken it down into 3 main tips.
1) YOU MUST SOAK AND SQUEEZE.
You must soak the soy curls until fully plump and juicy. You can use cold water but they soak up much faster if you use warm water (I don’t find it necessary to use boiling but you can). Then you must squeeze all of the water out of them! This way, they will be like a rung out sponge and absorb any flavorings that you add to them. I also think squeezing out this liquid helps to remove any stale taste they might have. (Heads up! Soy curls are made with only one ingredient and have no preservatives. Therefore, you want to keep an eye on their expiration date. You can also store them in the fridge to help keep them fresh for longer.)
2) YOU MUST SEASON THEM HEAVILY.
As I mentioned before, soy curls are basically flavorless so adding a good amount of seasoning is key. I like to use a no-chicken bouillon paste (this is linked below in under ‘shop’. Do note, they make an organic option but it can be hard to find!). You could also use a bouillon cube or a powder if that’s all you have. In addition, I like to add tamari and nutritional yeast for maximum umami. I’ll go over more about the seasoning blend below, in addition to optional add-ins. (Soy curls are naturally gluten free, but if that’s not a concern you could also use soy sauce instead of tamari.)
3) YOU MUST ADD ENOUGH FAT.
The reason for this is because we want deep and golden caramelization, in addition to some richness. Now, can you brown them in a non-stick skillet or add them to an air fry with no fat at all to keep them oil free? Yes! But then they would end up tasting a bit dry and not as delicious as they could be. With the right amount of seasonings, a good amount of olive oil, and browning, you can transform soy curls into something truly divine. Crispy, succulent, and totally delicious. Olive oil is my go-to oil to use with these but you could also use sunflower or avocado if you want something more neutral.

HOW TO COOK SOY CURLS: BASIC MARINADE
This basic marinade is quite magical. It is intensely savory and rich in flavor while also containing a good amount of fat which is exactly what we need for the soy curls. Poor things are truly just dehydrated soy beans and although we love them for what they are, they need this marinade to really make them pop. Aside from the savory components like tamari, nutritional yeast, and bouillon paste, this marinade also has vinegar which I believe helps to tenderize the curls. It also has onion powder and garlic powder. These two ingredients are a great way to incorporate a concentration of flavor. Once everything is combined, it tastes very chicken-y… but without the chicken!

HOW TO COOK SOY CURLS: OPTIONAL ADD-INS
ITALIAN-INSPIRED
A small amount of dried herbs such as oregano, thyme and rosemary can go a very long way, offering a beautiful herbal flavor. In addition, I like to add some chopped onion to this blend for an added savory sweetness. These flavored soy curls are particularly delicious served with roasted or mashed potatoes and some sautéed greens or steamed vegetables.
SOUTHEAST ASIAN-INSPIRED
Ginger, lemongrass, fresh chili peppers and shallots are common ingredients in southeast Asian cuisine and I absolutely adore them. You can push and pull this list of add-ins. Even if you only have a few, they can really make these soy curls sing! If you are going to use this blend, I would suggest using sunflower or avocado oil in the base marinade just to keep that flavor more neutral. Soy curls seasoned with this blend are lovely served with rice, to be used in fresh rolls, or combined with noodles.
MEXICAN-INSPIRED
Earthy and robust spices like ground cumin, coriander, and smoked paprika are the perfect flavor components to add to soy curls. Because they are a blank canvas, these pungent spices can make them vibrant and bursting with flavor. This blend is great to use when making items like burritos, tacos, or fajitas.

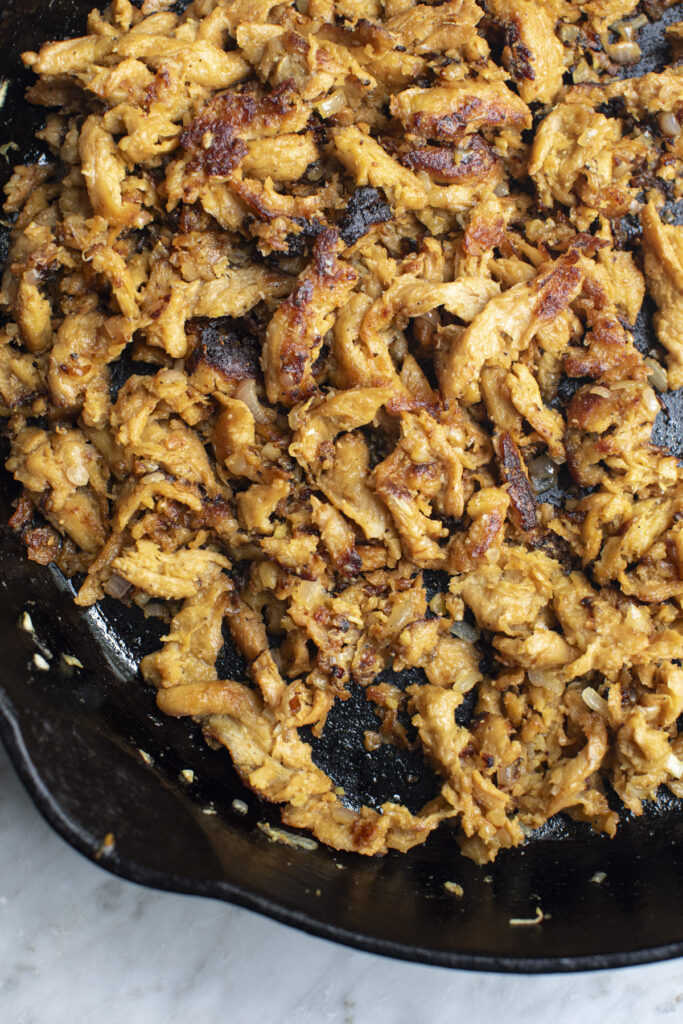
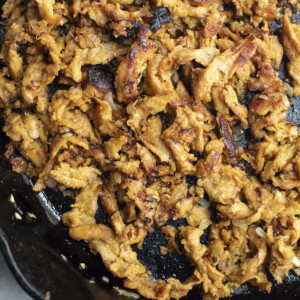
PAN-FRY UNTIL GOLDEN BROWN
Once you have seasoned the soy curls with the base marinade and any additional add-ins (if using), you simply mix them thoroughly until coated and then you are ready to pan-fry. I like to use my trusty cast iron skillet for this but I also will use a non-stick skillet if I am making a smaller batch. Either way, the trick here is to get the pan nice and hot. Once you add the seasoned soy curls, let them be so they can really get some nice browning. If you move them around too much, they won’t brown as effectively and you will look silly. Don’t be impatient.
FAQs
If you plan on keeping them for more than a two weeks, I recommend placing them in the fridge or freezer. This keeps them super fresh!
Once they are rehydrated and combined with the marinade, you can keep them tightly sealed in the fridge for up to 5 days.
I have tried doing this and they really need a good amount of fat to make them super delicious. Without it, they become dry and undesirable once cooked, in my opinion. I also think the browning that happens with the fat gives them great flavor and is much needed.
SHOP FOR HOW TO COOK SOY CURLS
Here are some of my favorite ingredients and items from my Amazon Storefront that you can use for this recipe. If you click these affiliate links and make a purchase, I will make a very small commission. This is no extra charge to you! This will help to support my business and allow me to continue sharing recipes, so thank you in advance:
Soy Curls (3-pack): I prefer to buy these in bulk and keep some in the fridge or freezer to have on hand.
Nutritional Yeast: An absolute must for easily adding savory flavor to recipes. This brand is excellent.
No-Chicken Bouillion: This bouillon paste is ridiculously delicious and savory! Truly incredible.
THAT CONCLUDES HOW TO COOK SOY CURLS
There you have it folks! How to cook soy curls: done my way. Once they look like the image above you can do so many different things with them…any way you would enjoy chicken! If you aren’t feeling creative, don’t worry, love. I will be sharing some fabulous recipes featuring them soon. Until then, if you do make them, please leave a comment and a rating below as this greatly helps my recipes to be seen. And if you share it on social media, please tag me. I love to see it. Happy cooking, y’all!
–Timothy
WATCH THE RECIPE
How to Cook Soy Curls
Ingredients
Soy curls
- 1 package soy curls, 8 oz / 227 g
- Water, to cover and soak
- Olive oil, to drizzle
Base marinade
- ½ cup olive oil
- ¼ cup nutritional yeast
- 1 tablespoon garlic powder
- 1 tablespoon onion powder
- 1 tablespoon no-chicken bouillon base
- 2 tablespoons rice vinegar
- 1 tablespoon tamari
- ½ teaspoon freshly cracked black pepper
OPTIONAL ADD-INS (choose one!)
Italian-inspired
- ½ teaspoon dried thyme
- ½ teaspoon dried oregano
- ½ teaspoon dried rosemary
- ½ small onion, 100 g/3.5 oz, minced
Southeast Asian-inspired
- 1 very large shallot, 145 g/5 oz, minced
- 2 heaping tablespoons ginger, 1 small knob/20 g, minced
- 1 tablespoon lemongrass, minced (optional)
- 1 garlic clove, minced
- 2 tablespoons mirin, or agave
- 1 teaspoon toasted sesame seed oil
- 1 small hot chili, minced (optional)
Mexican-inspired
- 1 teaspoon ground cumin
- 1 teaspoon ground coriander
- ½ teaspoon smoked paprika
- ½ teaspoon chipotle or regular chili powder
Instructions
- Soak the soy curls: Place the soy curls in a large bowl and cover with a few inches of water to soak for at least 20 minutes. Note: A bowl with a lid is ideal, especially for preparing in advance, but you can also transfer to a tightly sealed container to store.
- Drain and squeeze: Transfer the soy curls to a colander to drain. Use your hands to really squeeze out the remaining liquid. Then return the soy curls to the colander and leave them to continue drying out as you make the marinade.
- Make the marinade: To the same bowl you used to soak the soy curls, add the olive oil, nutritional yeast, garlic powder, onion powder, no-chicken bouillon paste, rice vinegar, tamari, and black pepper. Whisk to combine. It should be relatively thick but still smooth. Add the drained soy curls and stir to coat. Note: If you’re using any of the optional add-ins, you can prepare and add them now. Stir again to coat, and set aside. You can either cook the soy curls at this point or leave them to marinate in the fridge for easy meal prep.
- To store: If not cooking immediately, cover the bowl with a lid or transfer to a tightly sealed container. This will keep in the fridge for up to 3 days.
- Cook the soy curls: When ready to cook, place a skillet over slightly above medium heat and add a drizzling of olive oil. Once hot, add the soy curls and spread them into an even layer. Cook for 10-12 minutes, only flipping once halfway through to encourage browning. After 10-12 minutes, toss the soy curls thoroughly, scraping the bottom of the pan to lift up any brown bits. Once mixed around, cook for additional 5 minutes. Transfer to desired dish and serve!
I have followed all your tricks and the recipe to the letter. My marinade was really thick!
I have added the rehydrated soy curls and it is now like one big peanut butter glop!
I’ve bagged it all and placed it in the fridge until tomorrow to thoroughly marinade
How should I proceed tomorrow?
Do I scrape the thick marinade off?
Loosen it with water?
Help please!
Hi there! That is definitely how it is supposed to be. The thick marinade will brown beautifully and become golden and delicious, almost like a crust. Do not scrape the marinade off! Let me know what think you after you try them!
A framed picture of Tim Tim hangs in my kitchen.
When I make fajitas, I go Mexican style plus 1/4 cup of fresh lime juice. People go crazy about them and I insist they head here.
LOL! This made my morning. So, so happy to hear, David. Thank you for letting me know.
Timothy, thank you for being the sole contributor to my soy curl obsession! this is my go to base recipe for everything! I have made all of your variations too. Just as delicious. I make the whole batch for two of us as a part of our weekly meal prep – btw, just as good cold as hot. It make so much that even a half batch is several meals. So easy and flavorful and I didn’t change a thing. This a total game changer!
Angela! So, so happy to hear this!! Thank you for letting me know. It made my afternoon. Happy spring, friend!
I am shocked no one has commented one a HALF CUP of oil. Of course they are delicious, shoe leather made with this much olive oil would be. I’ll give it a try with half as much, which is already so much more than I ever use.
This recipes makes 4 big servings of soy curls which ends up being 2 tablespoons of olive oil per serving, which is not that crazy (in my opinion). More importantly, without it the soy curls will come out dry and not as tender and succulent and they won’t have the gorgeous browning that makes my soy curls taste as good as they do. Of course, you can pull back on the oil if you’d like but I have tested this recipe with less oil and the results are not as good. If you are looking to cook with less oil, you should try my baked tofu. You can omit the oil altogether with that recipe and it comes out great!
This has changed my LIFE. Bless you, Timothy!
Ayyy, this was so awesome to read! Thank you for letting me know. Happy new year!
I’m a fan of soy curls but was getting tired of simply adding barbeque sauce to the fried curls. This recipe — the basic one — is so flavourful that it’s become my new favourite! I’m going to try the variations in the near future. Thank you!
Donna! This makes me so happy to hear! Thank you for letting me know. Happy cooking.
I generally do not rate or leave reviews for recipes, but I just had to let you know how fantastic this soy curl recipe is. I recently transitioned to a vegan diet for health reasons & have been struggling to find tasty recipes. The soy curl recipe hits it out of the park. I tried it with the Mexican seasoning and it was delicious. The texture & juiciness of the soy curls is so reminiscent of meat. FANTASTIC. This recipe is a keeper & I’ll be trying the other seasoning options.
Shirley! I so appreciate you taking the time to write a review. I really appreciate it. I adore this recipe and am thrilled to hear you love it! Happy cooking.
This recipe is perfect and became a staple in my household. Squeezing the water all is mandatory! I tried once without doing it with my own hands and the seasoning did not well blended with the soy curls. Thank you! Can’t wait to try new recipes!
Hi Marina! I agree, soaking and squeezing is key! Thank you so much for letting me know and happy cooking. I appreciate you being here.
Excellent preparation for soy curls!
So happy to hear! Thank you!
Okay— you are a magician and these reviews are accurate! I have been making soy curls for years. I even buy the 12 pounds from Butlers. I have seen your recipe before and I’m kicking myself for not trying it sooner! The marinade gets all the way through and they crisp up so well. This was amazing with my cabbage and onions and I can’t wait to share this recipe with others, and make the variations. I will also be doing a deep dive into your other recipes for some meal planning. 🙂 Thank you so much for this delicious recipe!
Aww, Lillian! This made my evening! It’s funny, I think when I first started cooking soy curls, I wasn’t really getting it. But after playing with it over time, I realized that you could really transform them into something incredible but you have to use the right amount of fat and seasonings. So happy this recipe resonates with you! Thanks for being here and happy cooking.
This introduced me to soy curls. I ordered them to make this and now they are a staple for me. The recipe is amazing.
Hi Debbie! Thank you very much for letting me know. I am so happy you like the recipe. Soy curls are the best!
This was my first time making soy curls and I’m glad I found your article. They turned out PERFECTLY and I appreciate your info on different types of marinades! Much easier than trying to crisp up tofu!!
Ayy, so happy to read this, Teri! Thank you for letting me know! Happy cooking.
Amazing, thank you so much! Made just your basic marinade then after they were cooked, I added some BBQ sauce I made the other day. So, so good!
Oh, that’s a great idea with the BBQ! I’ll try that, too. Thanks for being here!
THANK YOU! I was looking for another soy curl recipe to add to my repertoire and this was wonderful! Now I can’t wait to try your other variations. And thanks for the suggestion to squeeze them dry, such a no-brainer that I never thought of! 🤣
Hello! I am so happy to hear this. They have such a great glow up when you give them some extra love. Happy cooking and thanks for being here!
Recipe looks awesome. Is there some way to print just the recipe and not all the adds, etc? Thanks, Oregonian wants to cook these!
Hi Pam! I just added a print link, right above the recipe card. LMK that it works for you!
I thought I had been making soy curls for years, but last night I tried it your way and if that’s how good soy curls are supposed to taste, I have *not* been making them!
These turned out simply amazing — super flavorful, nice crispy edges but still wonderful chewy texture. My partner doesn’t usually like soy curls, even at restaurants, and she *loved* these. We couldn’t stop eating them. Thank you so much for sharing your technique!
Ayyy, this made me so happy to read, Rich! They really do transform, don’t they? Thanks for letting me know. Happy cooking!