
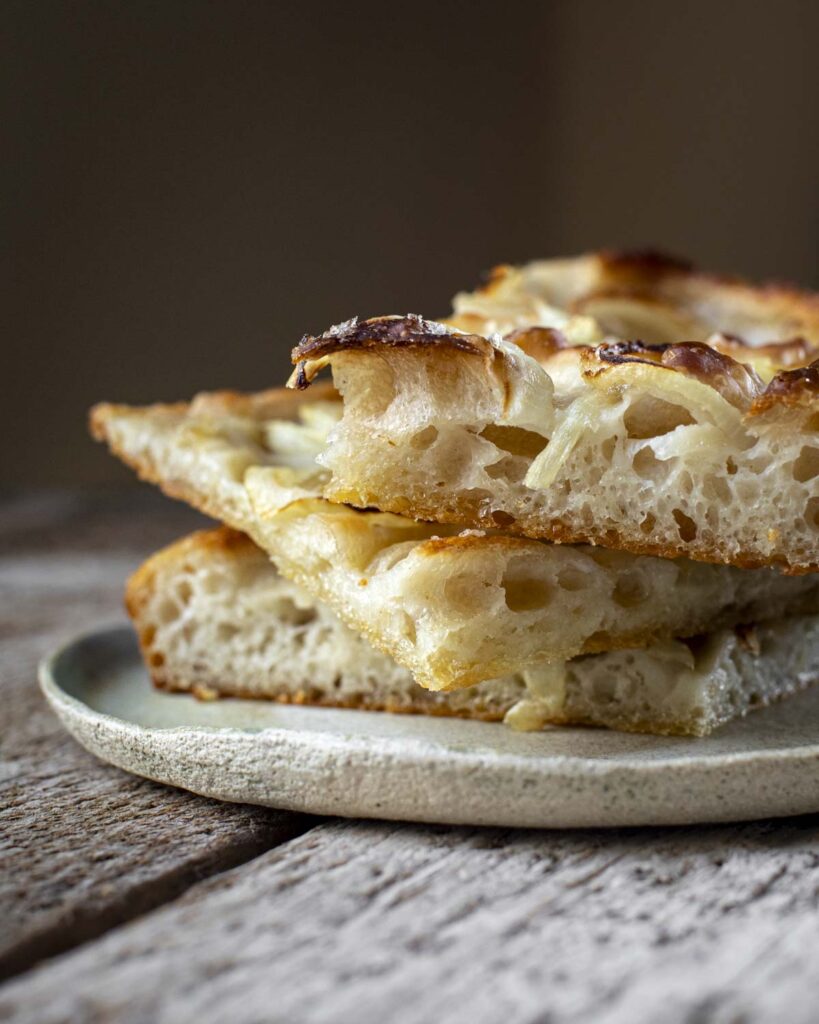
Focaccia Genovese is a very thin focaccia that has a lovely chewy texture and a crisp, golden crust. What makes it unique is the brine that is poured over the dough before baking: a mixture of olive oil, salt, and water. When these ingredients are whisked together until creamy, poured over a thin layer of dough, and baked, the results are an out-of-this-world delicious bread that has great flavor and beautiful richness.
To put my own spin on things, I like to make it sourdough, adding a lovely depth of flavor. I also prefer adding additional toppings over top, such as julienned potatoes (because, hello, potatoes) or thinly sliced onions for added texture. Depending on my mood, I will either make one large loaf using all of the dough or I will split the dough in half and create two very thin and super crispy loaves. Whichever way you choose, the final bake results in a golden brown flatbread with a gorgeous chew that’s cut into nice little slices. Now, who could resist?

SOURDOUGH STARTER
The first step with this recipe is starting off with a good, strong sourdough starter. For me this usually involves taking my starter out of the fridge, feeding it a few spoonfuls of fresh flour and water, mixing it, and letting it double in size at room temperature. Then I take a small scoop of that newly revitalized starter and transfer it to a new jar with more fresh flour and water (I fill the jar halfway and the texture should be like a very thick pancake batter). Then I cover that and let it double in size. (This will vary depending on your starter and the temperature of your kitchen but it usually takes at least a few hours, if not several. Keep an eye on it!) Once it is nice and bubbly (see image above), you are ready to make your dough!
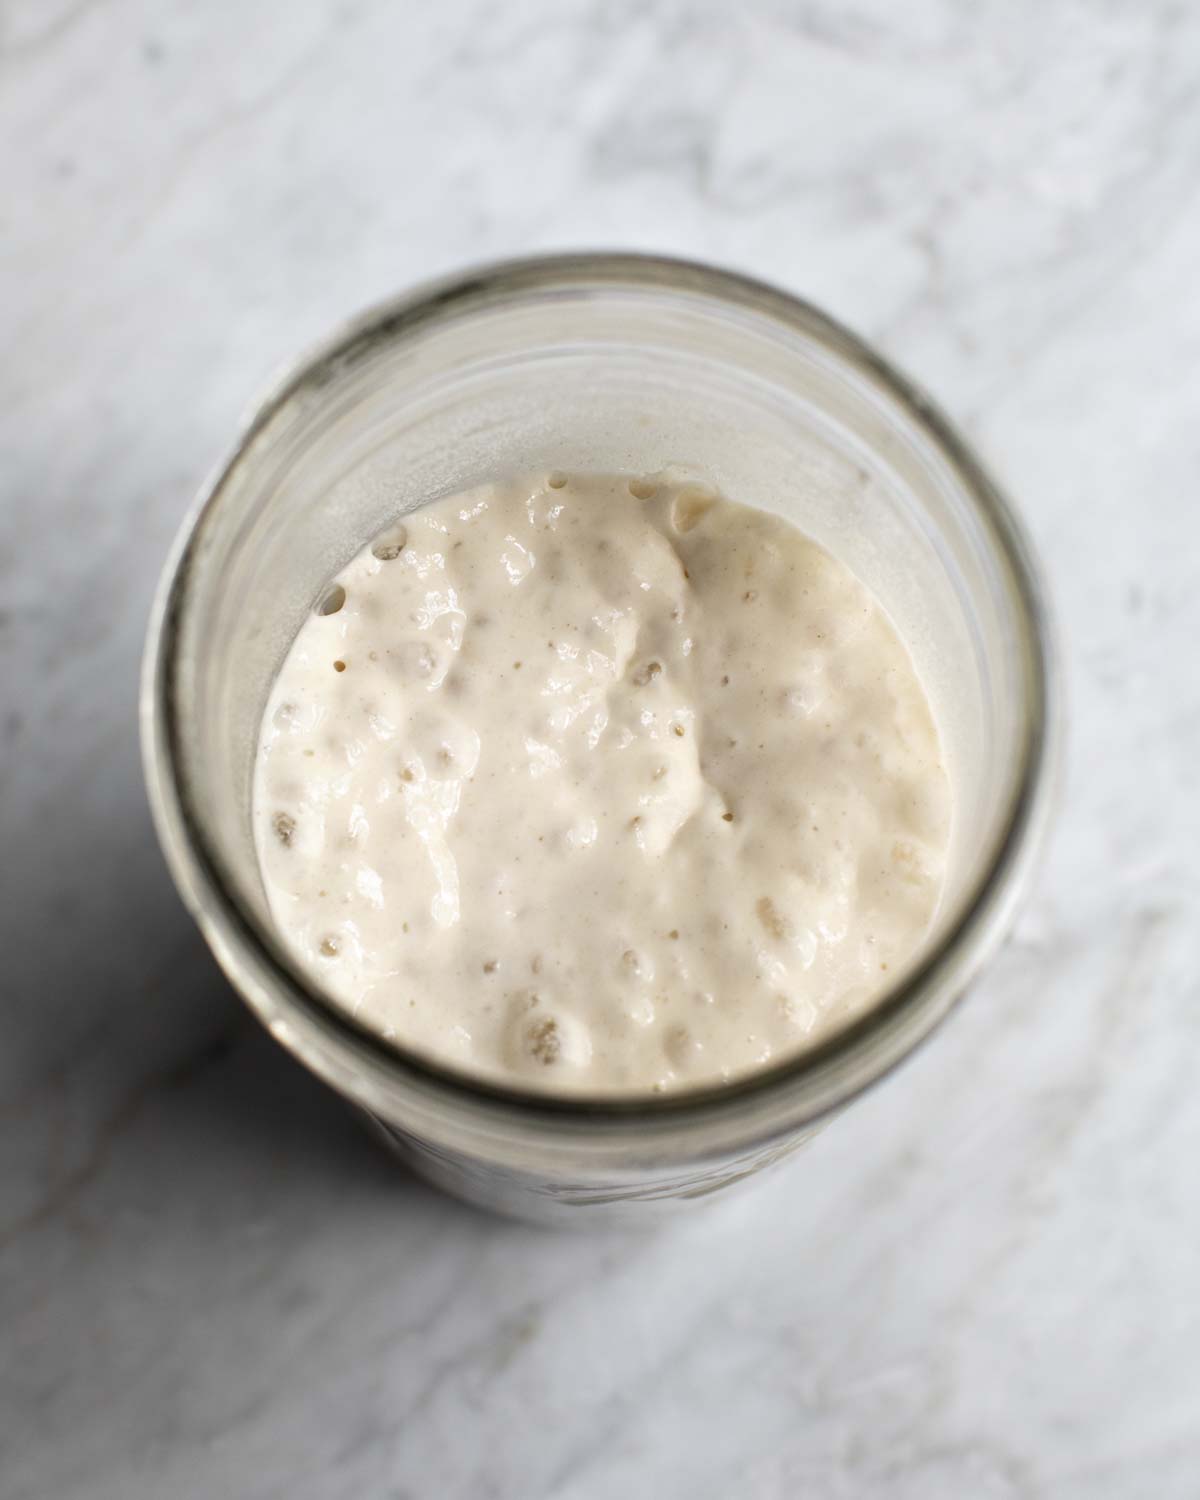
Keep in mind, the starter needs to be strong and active. If you scoop a small amount out and plop it in a bowl of water, it should float. If it doesn’t, that means you need to let it grow more or offer it another feeding.
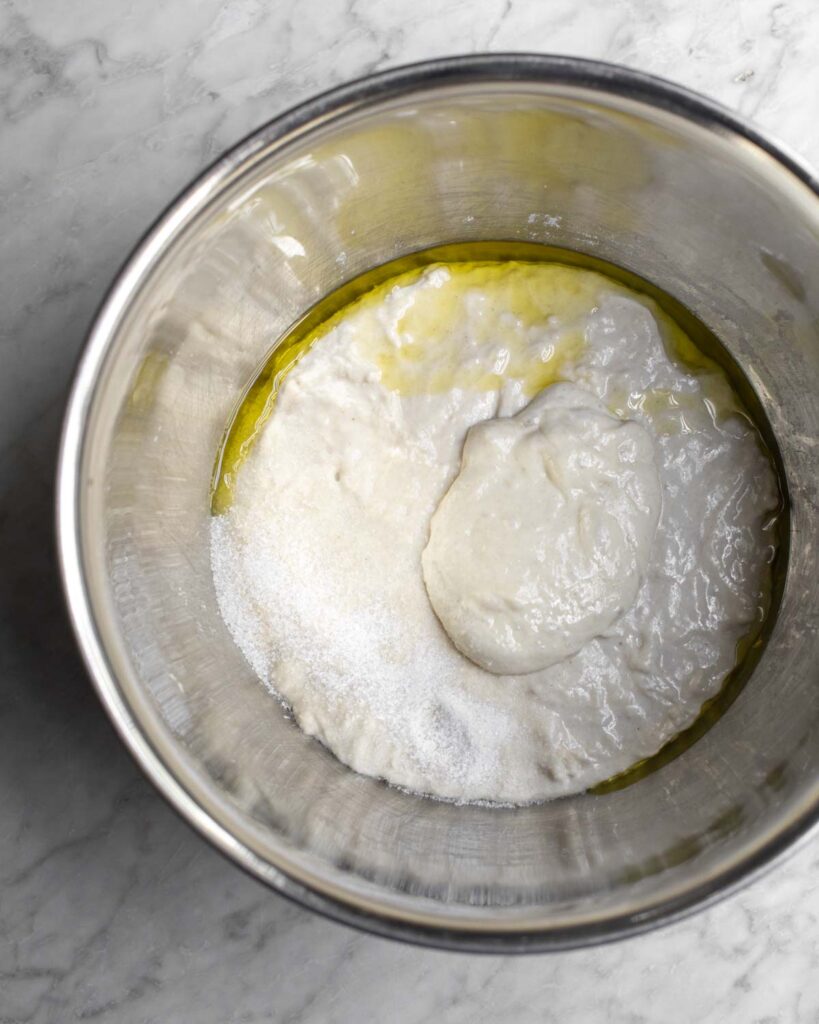
COMBINING AND MIXING THE DOUGH
When it comes to mixing the dough for this Focaccia Genovese, there are a few key things to remember. One is the autolyse. This is the time where just the flour and water have time to sit and get to know one another. It’s important to let this happen because it will make the dough soft and pliable and much easier to incorporate the starter, salt, and olive oil into the mixture.
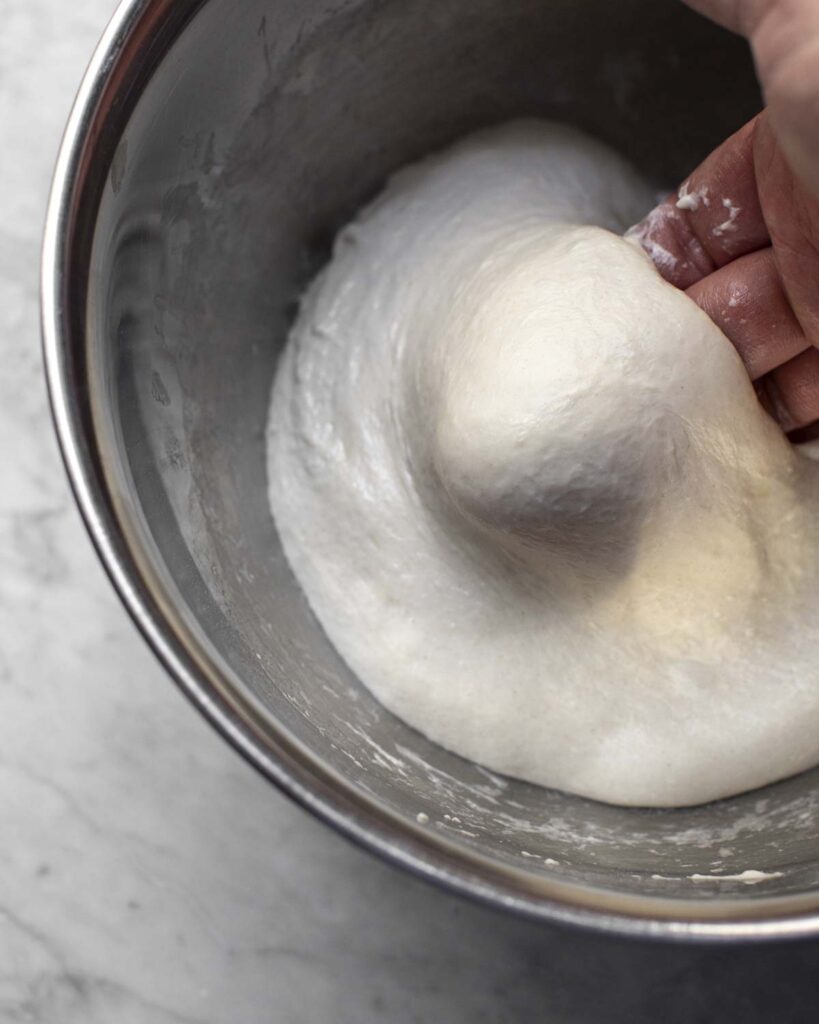
Next, you need to mix the dough with your hand using the Rubaud method for a good 5 minutes. There are no stretch and folds for this dough (I wanted it to be very quick and easy), only one coil fold before the dough is left to rise, so this initial 5 minutes is very important. Watch my video below to see how to do it. Essentially, this method is basically replicating the motion of a diving arm mixer (a machine) but with your hands. It is a fantastic way to create a beautiful texture.
COIL FOLD AND LET RISE
After the initial mix and a rest, you will grease another bowl with some olive oil and set it aside. Then, you will coil fold the dough and transfer it to the newly greased bowl (see video below). If you have never done a coil fold, it is basically lifting the dough up and letting the sides fall underneath it multiple times while using greased hands. Then you rotate the dough and repeat this until the dough tightens up into one nice blob. Watch my video below to see exactly how I do it. This will tighten up the dough and make the final texture chewy and delicious. HEADS UP: This is a high-hydration dough which makes it very sticky and jiggly. Do not be tempted to add more flour! It is supposed to be loosey goosey.
Once the coil fold is performed, you transfer the blob of dough to a new bowl that is greased with olive oil. At this point, you will cover the dough and leave it at room temperature to double in size. Greasing the bowl will help it to release eventually, so don’t skip that step!
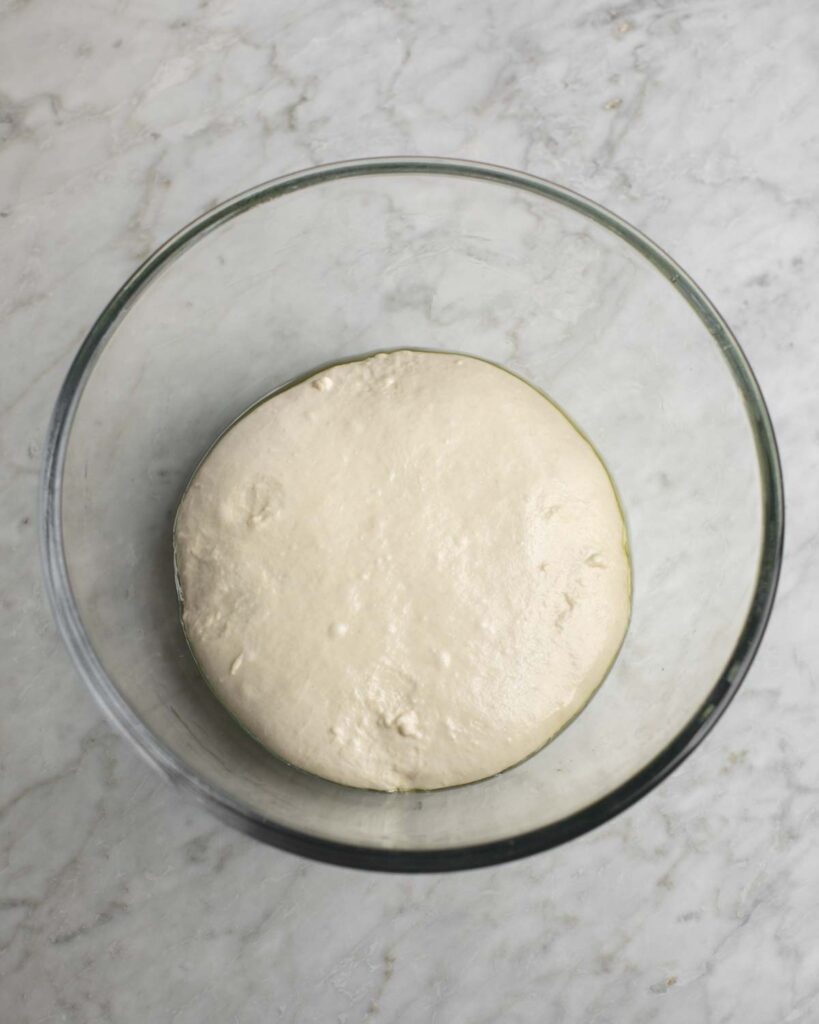
LET THE DOUGH RISE
Once the coil folded dough is transferred to the new bowl, you will let the dough rise until it has close to doubled in size. This will take around 7-8 hours, so if you would like to do a same-day bake, I would make this dough in the morning as early as you can. (This means you should feed your starter in advance to make sure this timing works!)
SHAPING AND TOPPING THE DOUGH
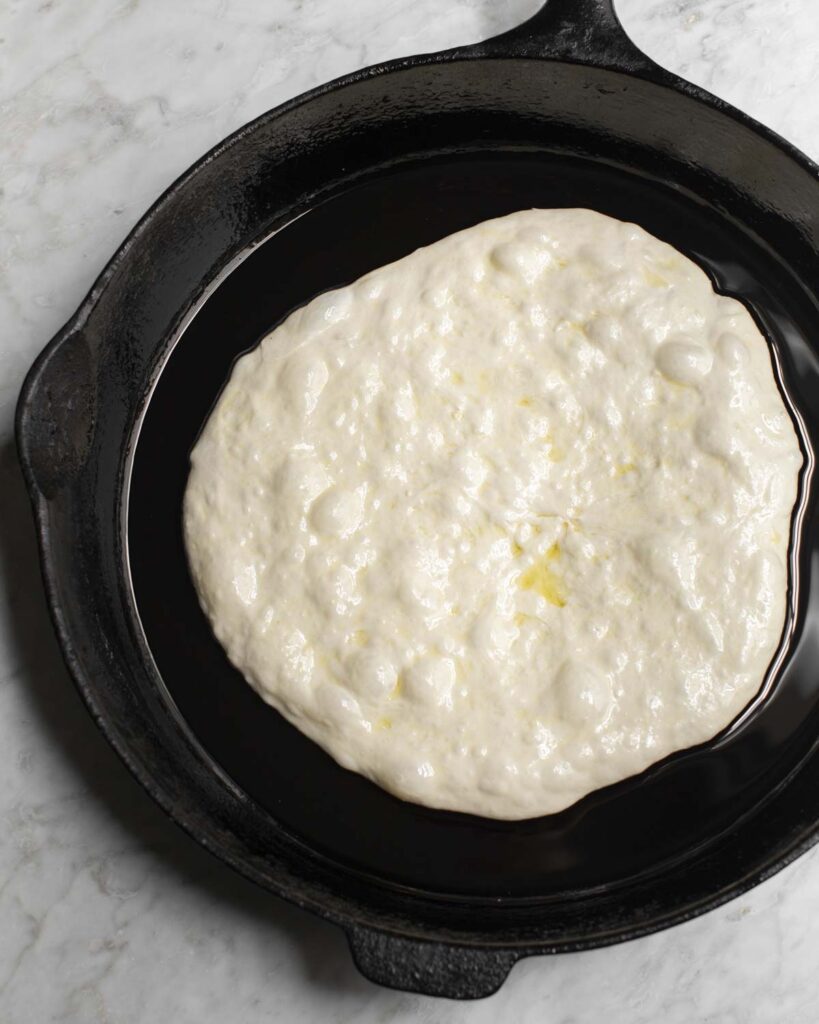
When the dough is ready, it’s time to bake and you have a few options. I personally like to make this Focaccia Genovese in a cast iron skillet (mine is around 13″) or a cast iron casserole dish because I love the crust that it creates but you could use a well-greased baking sheet. Next, you need to decide if you want to make two very thin loaves or one slightly thicker loaf.
This dough is very flexible and you can really shape it to do whatever you want. For example, you could make one very large rectangular loaf or multiple small circular loaves as individual servings. This is personal preference, so have fun with it!
TOPPING AND BAKING THE FOCACCIA GENOVESE
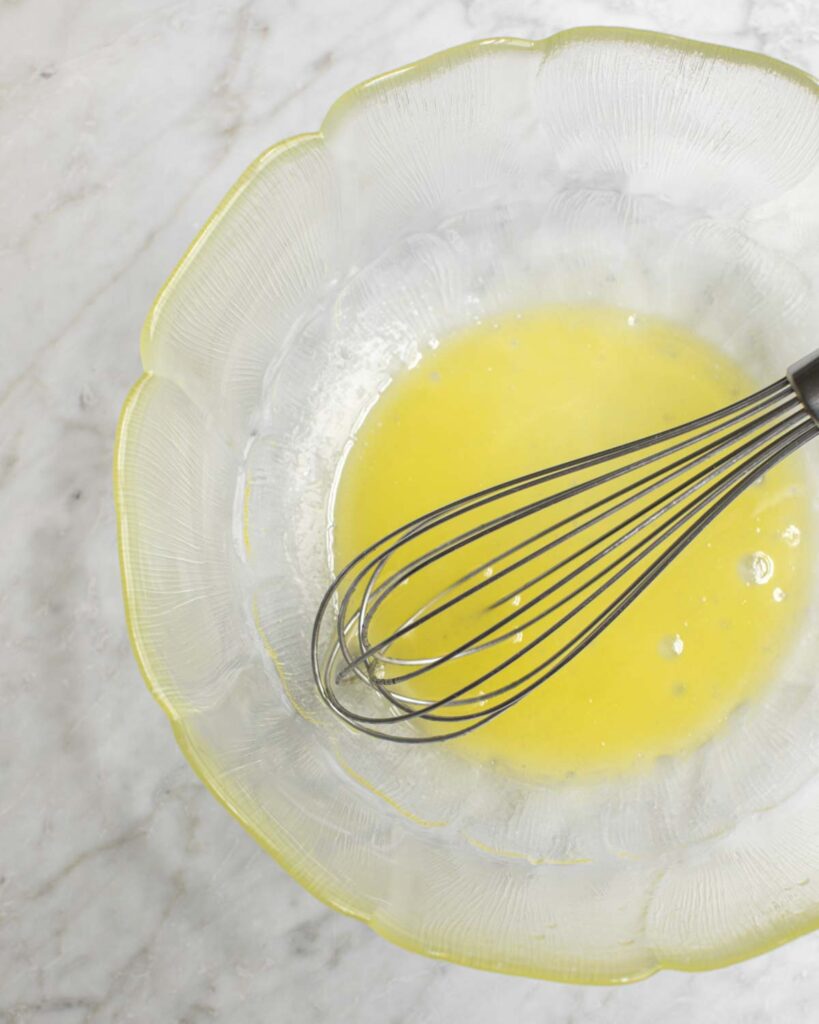
Once the dough has been stretched and shaped in your desired vessel, you can prepare the toppings. First, make the brine by whisking together the olive oil, salt, and water. I know it may seem like an odd combination, but if you use a larger bowl and a whisk, you will have plenty of room to vigorously mix and it does all come together! The final texture will be like a creamy dressing. This really makes the final bake special!
PREPARE THE POTATOES OR ONIONS
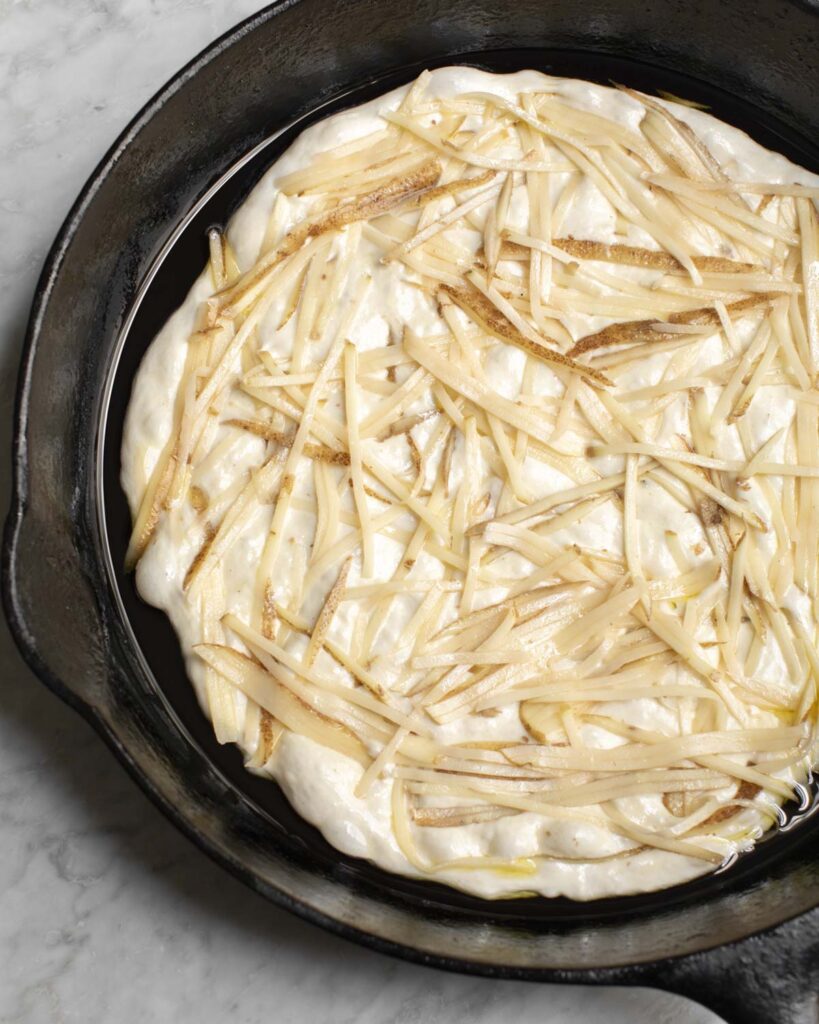
Next, to prepare the optional toppings, you will need to julienne the potatoes or slice the onions. I like to use a hand-held julienne peeler (linked below) for the potatoes but you could also use a sharp knife or a mandoline. Once cut, I like to toss the pieces of either in a little drizzling of olive oil. Then you scatter them over the dough and gently press them into the surface. Then you drizzle the brine evenly over top and bake until golden and crispy! Lastly, I like to finish the baking with a broil to achieve some nice color on top. You can also opt not to use any toppings and simply dimple the dough with your fingers.

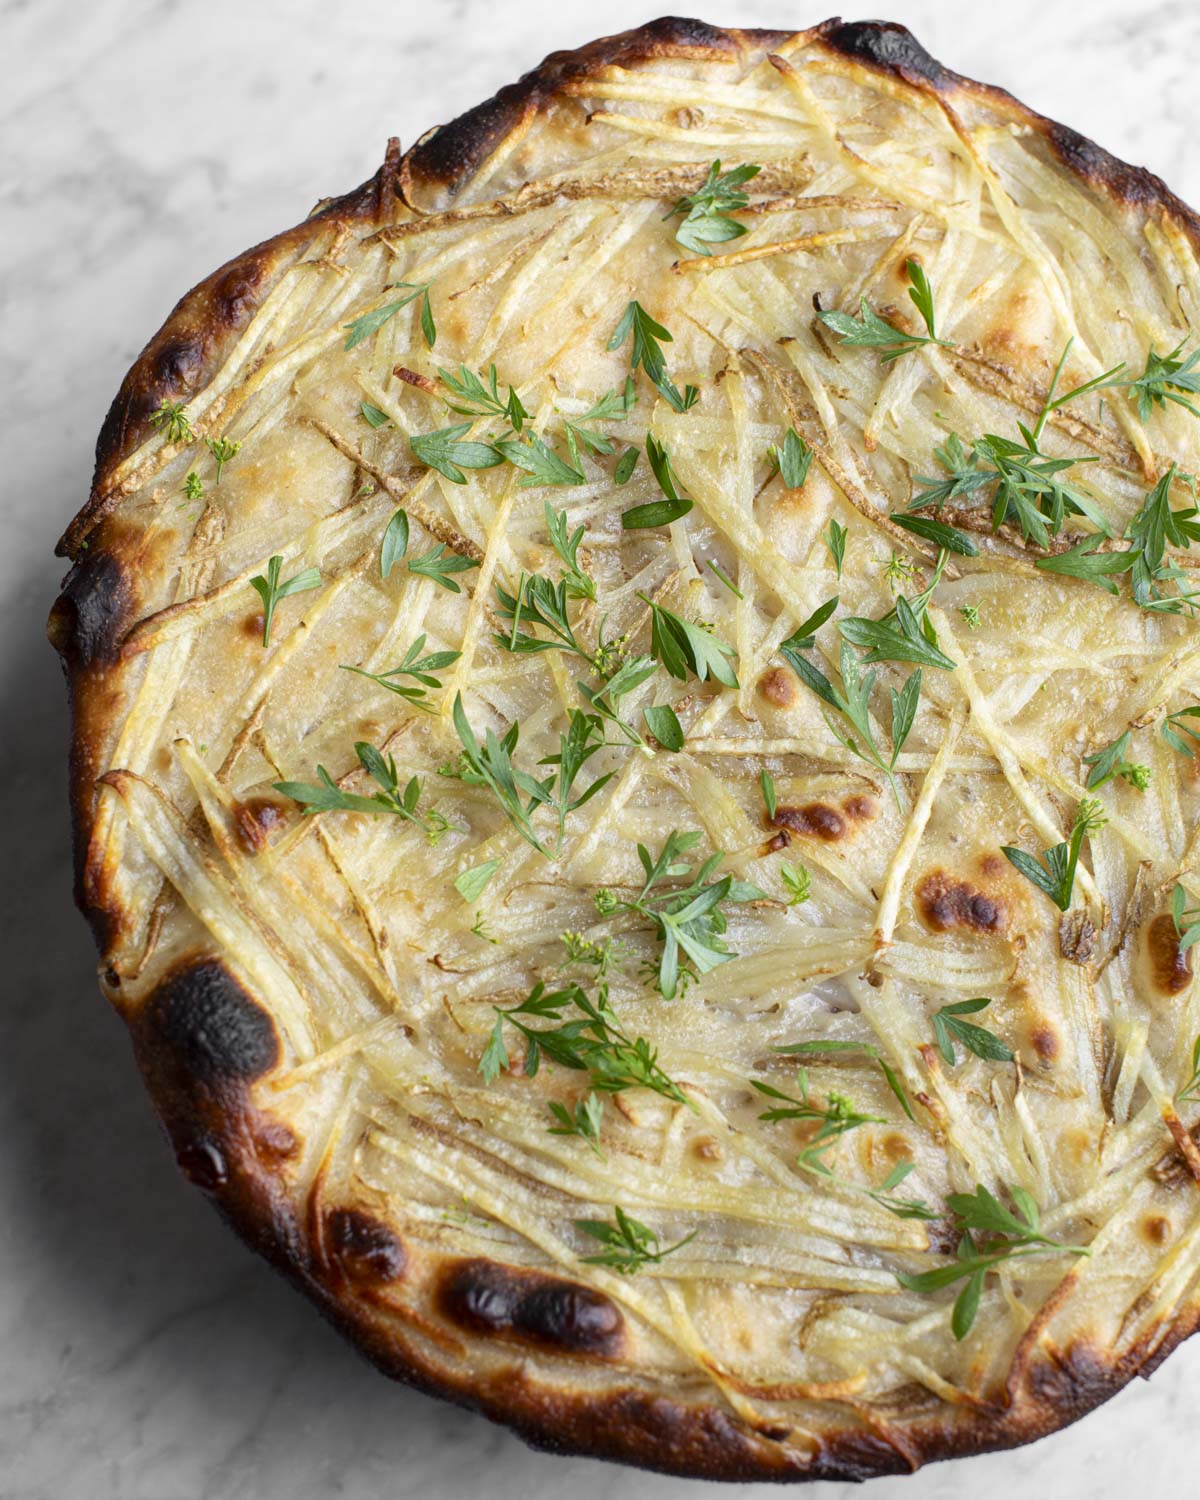
If you look above, you will see a thinner loaf made in my round cast iron skillet by splitting the dough in half. The final texture was super crispy and crunchy, which I adore! While this was baking, I placed the other half of the dough, covered, in the fridge and baked it off later in the day. Clearly, it doesn’t last long!
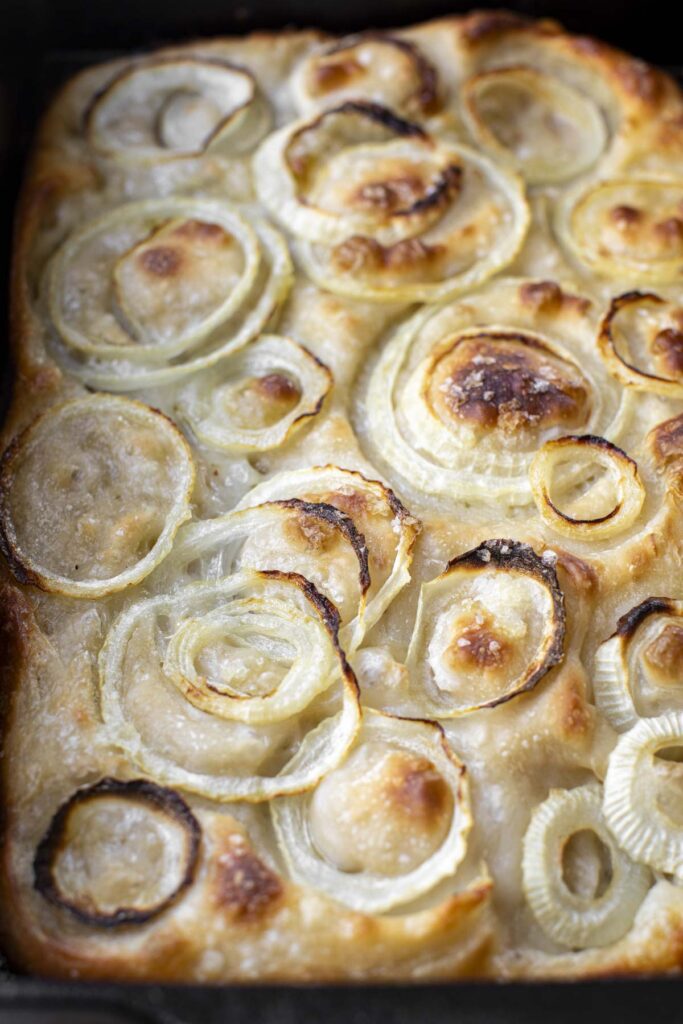
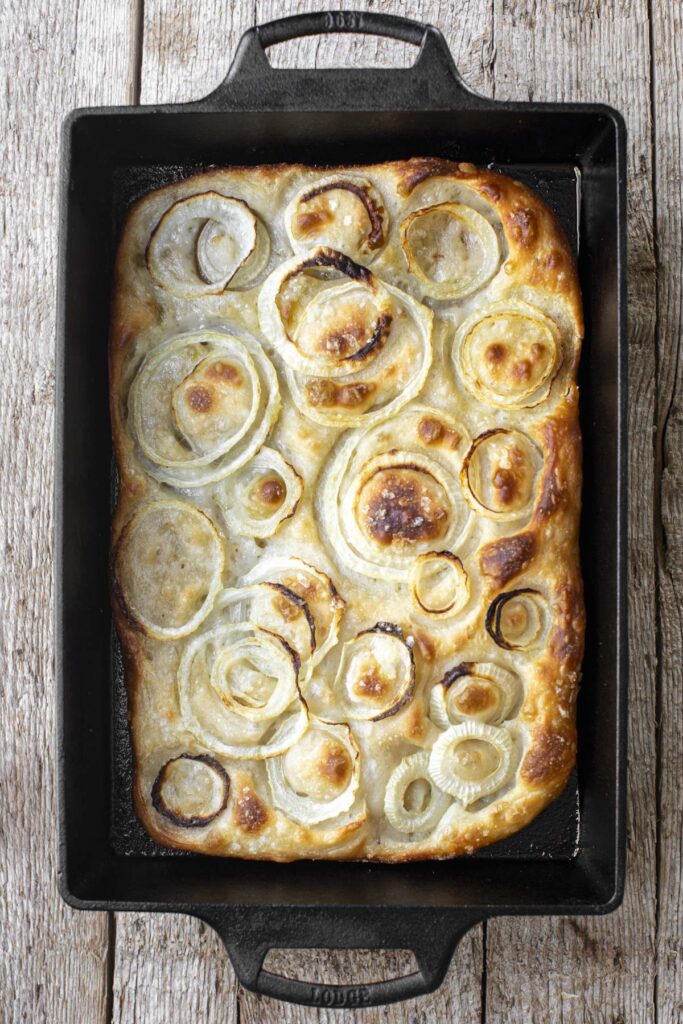
If you look below, you will see a larger and slightly thicker loaf in my cast iron casserole dish featuring sliced onions as the toppings. This rectangular loaf still had a golden brown and crispy crust but a bit more of a fluffy interior to bite into. As I mentioned before, deciding on which way I want to make it really depends on my mood. Do what you feel!
SHOP FOR THIS FOCACCIA GENOVESE
Here are some of my favorite ingredients and items from my Amazon Storefront that you can use for this recipe. If you click these affiliate links and make a purchase, I will make a very small commission. This is no extra charge to you! This will help to support my business and allow me to continue sharing recipes, so thank you in advance:
Hand-Held Julienne Peeler: This tool is essential to every kitchen, in my opinion. It allows you to carve noodles/long strands out of so many different vegetables, including the potatoes for this recipe. I cannot recommend one enough!
King Arther Bread Flour: This bread flour is my go-to for baking. It is high quality and its higher protein content is great for baking bread.
Lodge 15-inch Cast Iron Skillet: This large cast iron skillet is great for baking bread (and also roasting vegetables!). I highly recommend investing in one and it is already pre-seasoned. This is actually larger than the skillet I have (which is around 13 inches) but I think investing in a larger one is ideal, just because you have more room to cook with!
Lodge 9″x13″ Cast Iron Casserole Dish: You can use the whole batch of dough in this awesome vessel to make a slightly thicker loaf that’s a rectangular shape.
WATCH ME MAKE THIS RECIPE
SERVE THE FOCACCIA GENOVESE
Once the loaf has cooled on a wire rack for 10 minutes, you are ready to slice and enjoy! You can cut it any way you see fit, but I quite like slicing it into squares. A fresh showering of fresh parsley (or thyme or even basil) is a lovely touch, as well.
I hope that y’all love this sourdough Focaccia Genovese! It is a delightful bread that’s a great offering to friends and family. If you do make it, please leave a review and comment below. I’d love to hear from you.
Happy baking!
-Timothy

IF YOU LIKE THIS RECIPE, CHECK OUT THESE:
Sourdough Focaccia
Drop Biscuits
Firecrackers
Dough 325 g bread flour (2 ⅓ cups) Optional Toppings 1-2 small russet potatoes, julienned Brine 50 g water (4 tablespoons) Make the dough: In a large mixing bowl, combine the flour and water. Mix well until incorporated and cover (using your hands or a Danish dough whisk). Let it rest for 20 minutes (this is called autolyse!). Once rested, add the active starter, sea salt, and olive oil. Using wet hands, combine and mix the dough for a good 5 minutes using the Rubaud method, like in this video. Then let the dough rest for 30 minutes. Coil fold the dough: Next, grease a separate bowl and set aside. Using wet hands, coil foil the dough a few times, rotating the bowl as needed, until it comes together into one blob, like in this video. Then transfer the dough to the set-aside well-greased bowl. Cover and let it just about double in size on the counter, around 7-8 hours (depending on the temperature of your kitchen). Preheat the oven and stretch the dough: Once the dough has doubled in size and you are ready to bake, preheat the oven to 500°F (260°C). Then use well-oiled hands to split the dough into two equal parts. Transfer one piece into a well-oiled large cast iron skillet or baking sheet (and cover the remaining dough and place it in the fridge until ready to bake). Using your fingers, spread the dough out into a thin circle or rectangle. Let rest for 10 minutes while you prepare the toppings. Mix the brine: In a large shallow bowl, add the water, olive oil, and salt. Whisk until creamy. Set aside. Prepare and add the toppings: While the dough is resting, use a julienne peeler (or knife or mandoline) to peel the potato or slice the onions with a large knife. To a small bowl, add the potato or onions and a drizzling of olive oil. Toss well to coat. Then use your fingers to sprinkle and spread the toppings over the dough and gently press them in. (If you are not using any toppings, simply dimple the dough with your fingers.) Add the brine and bake: Whisk the brine again and then pour it evenly over the bread. Bake for 13-15 minutes, then broil for around 3-5 minutes, until the potatoes or onions and edges are slightly golden. (Always keep a close eye on it when broiling. You just want to achieve a little color on the top for extra flavor and texture.) Remember: every oven is different. If the bread needs additional time, simply add it! Cool and serve: Once the loaf is done, use a thin spatula to transfer it to a wire rack to cool for 10 minutes. Sprinkle with roughly chopped fresh herbs, if using, slice, and enjoy! This dough recipe can be baked as one thicker loaf or two very thin and crispy loaves. If you are making two loaves, simply divide the brine in half and separate the toppings evenly. You can place the other half of dough in the fridge (covered) and bake it off within 24 hours.

Ingredients
275 g water (1 ¼ cups)
50 g active starter (2 tablespoons)
6 g fine sea salt (1 teaspoon)
8 g olive oil (2 teaspoons)
1 medium onion, thinly sliced
Drizzling olive oil
Large handful fresh herbs (such as parsley or thyme), to garnish
40 g olive oil (4 tablespoons)
8 g fine sea salt (2 scant teaspoons)Instructions
notes
If using the potato topping, make sure to cut them right before using them, as they will brown quickly.
Instead of using a large cast iron skillet (around 13 inches), you could also use the dough on a large baking sheet or in a baking dish (there is a cast iron dish linked above), resulting in a rectangular shape. Just make sure to grease it well or the dough will stick!
If you'd like to make the dough in advance, after the coil fold, you can transfer the dough to a covered bowl and keep in the fridge for up to 2 days. When ready to bake, let the bowl sit at room temperature until it has doubled in size. (Chilling the dough will greatly reduce the rising of the dough, so keep that in mind.)
Food styling, photography, recipe, and text by Timothy Pakron
10 comments
… … … okay your email zinnias made my day and THIS, dear Timothy was amaayyyyyyzing! just happened to have my starter all ready to go from a rosemary lemon sourdough boule done the night before, so it was a snap!
that brine is a stroke of genius — kinda like a bread marinade? 😋
U think it’s ok to add smashed roasted garlic and/or carmelized onions w the potatoes? it’s already so so good! ty! xo
Oh gosh, this made my night! SO so happy to hear this!! I actually made this before with onions (sliced thinly) and it was bomb and I definitely think roasted garlic would take it over the top in a great way. Do it! And thanks for being here.
This looks so incredible! I’m wondering if it would work with yeast instead of sourdough starter? I know it wouldn’t be quite as elegant, but I gave up maintaining my sourdough because I’m just one person and it was too much.
Hi Lynn! I actually think yes… this should be fine. I am thinking half a pack of yeast (3.5 g) would be equivalent to the 50 g of active starter and should work well. That said, the rise will probably take much less time this way, so just keep an eye on it and when it has just about doubled in size, you are ready to bake. LMK how it turns out!
Incredible!!!
I used frozen pizza dough. I work alot, dont judge.
Anyways…the brine is a big deal! This was new to me…brine…on foccacia?
it just added so much flavor!
I will make this many, many times!
I used thinly sliced onions and in season grape tomatoes sliced in half..
Delicious!!
Sounds great to me! Thanks for letting me know!
I’m a big fan of your recipes as you hopefully know by now. Flavors and final texture of this focaccia were incredible! Dough was very slack after the long rise (and I followed your instructions—weighing ingredients). I decided to add more bread flour and more stretches. Placed in fridge overnight. On day two (and after 8+ hours out of fridge), I had to pour into cast iron skillet. I’d love some feedback in regards to consistency of dough. I’m a seasoned sourdough baker and I am familiar with all of the steps mentioned in your recipe. My starter was definitely active when I used. I love the julienned potato topping!
Hi there! I just emailed you a video to show you what the dough is supposed to look like. It is a very wet and jiggly dough and you definitely need to used greased (or wet) hands to work with it!
Delightful focaccia genovese
I appreciate you!