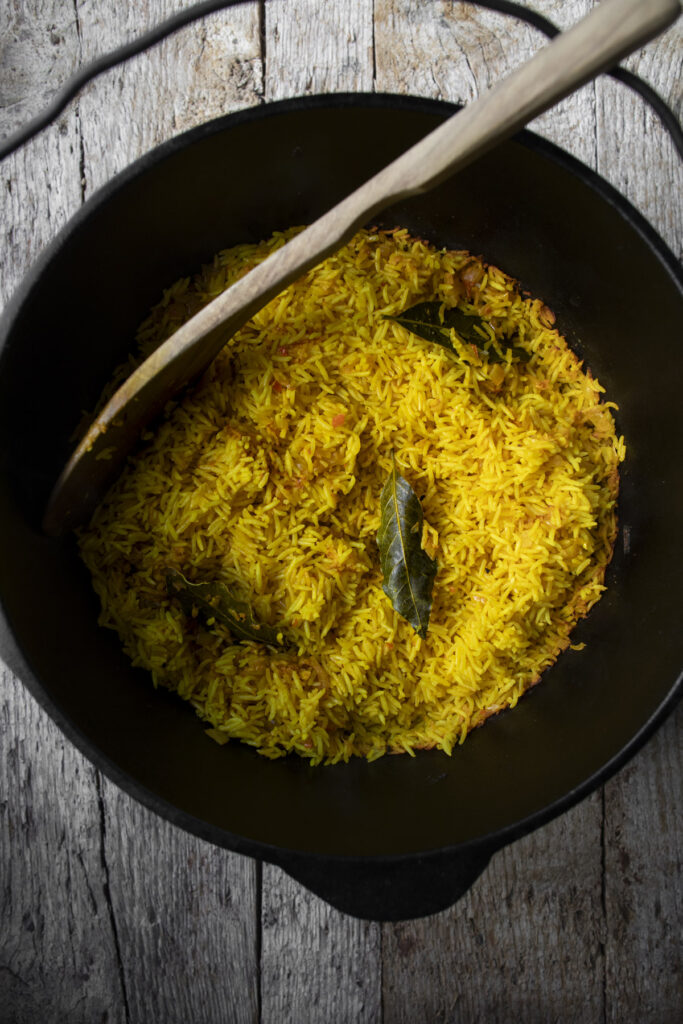
This yellow rice is a flavorful upgrade of my tried-and-true Easy Baked Rice recipe. I was inspired recently to recreate a classic plate from the halal carts in NYC. (You can read more about my memories of this dish from my time living in New York in the Chicken & Yellow Rice blog post.) Variations of yellow rice are popular around the globe, usually getting their brilliant color from turmeric or saffron. This particular version is turmeric-based. I up the flavor of my usual Easy Baked Rice by sautéing shallots, garlic, and chilies before also toasting the rice. Then I add turmeric, black pepper, chipotle or chili powder, and bay leaves which gives the rice an earthy, robust flavor and gorgeous bright yellow color. Nutrient-dense and beautiful! Then simply add water and rice vinegar, cover, and bake. After only 30 minutes, you will have perfect fluffy yellow rice. You’re welcome!
YELLOW RICE VARIATIONS
Yellow rice is a very important dish in many different cultures. Turmeric and saffron are likely the most commonly known ways to achieve the sunny yellow color, but some dishes also use annatto seeds, also known as Achiote. You can read more about annatto-tinted rice, as well as variations that use saffron or turmeric here. The author outlines how the different aromatics and spices change depending on which part of the world is influencing the dish. This one uses turmeric, inspired by the region where turmeric is native, which includes Southeast Asia and the Indian subcontinent.

DON’T FORGET TO RINSE YOUR RICE!
The first step (and a crucial one!) is to rinse the rice thoroughly. One of my favorite methods involves placing the rice in a fine mesh strainer before rinsing. Hold the strainer under running water and use your other hand to move the rice around. Try and keep moving it around and rinsing until the water is noticeably clearer. You may not get the water to run fully clear, but do your best. The rice will be better because of it. In regards to the rice variety, I recommend long grain white basmati for this recipe.
YELLOW RICE IN A PINCH
The full recipe involves sautéing fragrant aromatics in plant butter, then adding the rice and spices and letting those get nice and toasty. It makes for a leveled up but still easy rice dish, and the aromatics add a lovely bit of freshness. While that is wonderful, there are shortcuts available if you need this dish to be even quicker and easier! Simply replace the shallots and garlic with 1 tablespoon each of onion and garlic powder. (You can also replace the optional fresh chili with a pinch of crushed red pepper flakes.) Another option is skipping the toasting step altogether. Just add 2 tablespoons of melted butter or olive oil along with the spices, rinsed rice, and liquids to a Dutch oven or baking dish with an oven-safe lid. Then stir to combine and bake as directed.
SAUTÉING THE AROMATICS FOR THE YELLOW RICE
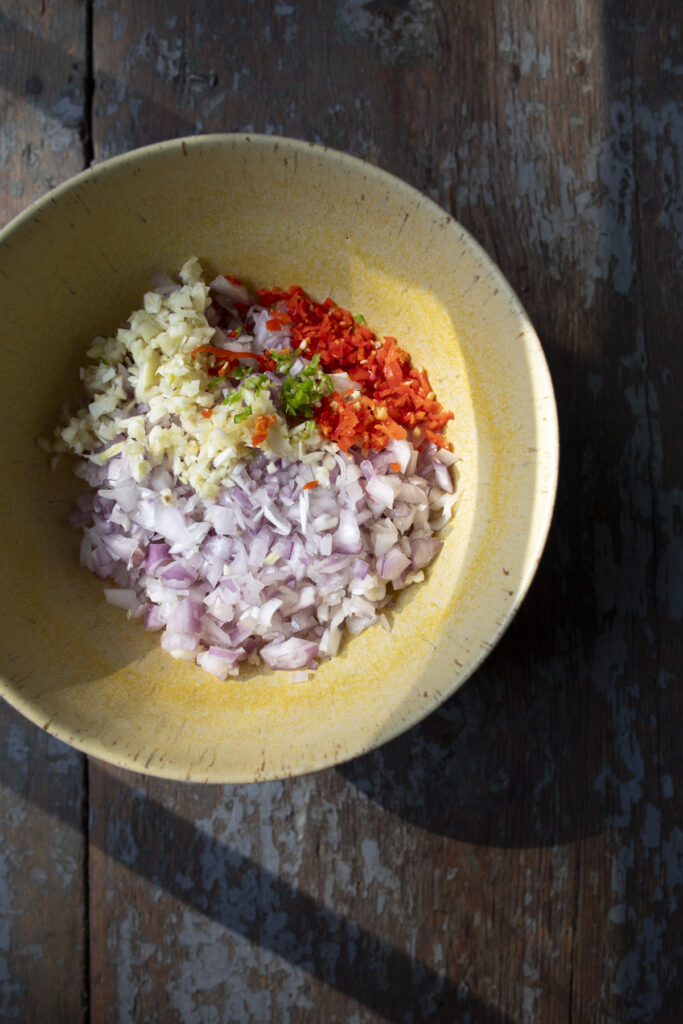
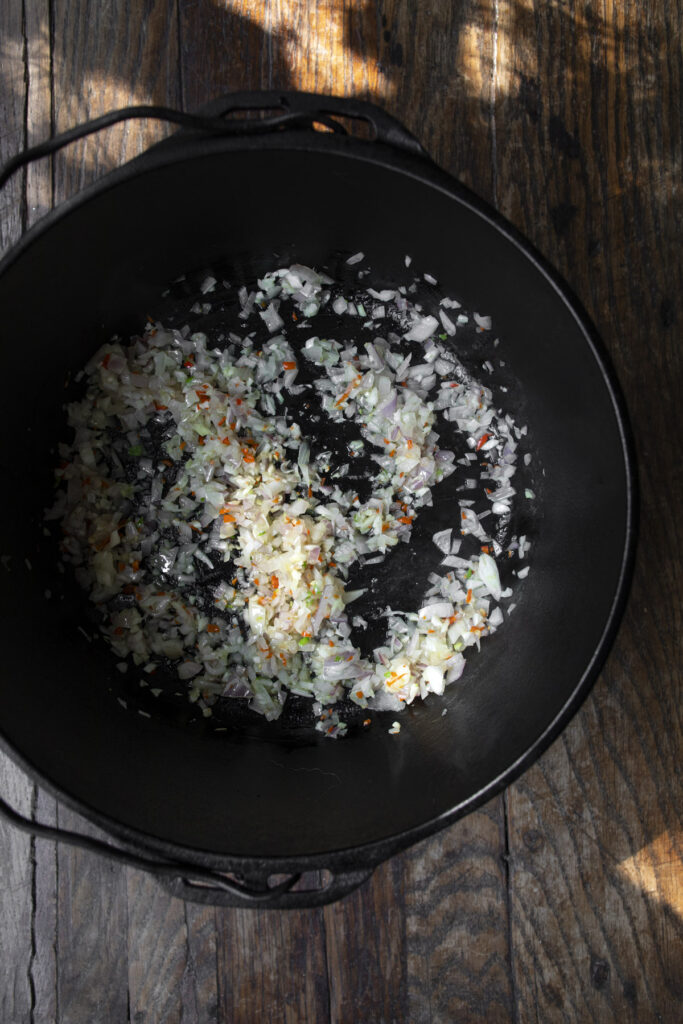
Next, we can discuss this optional (but highly recommended) step of sautéing the aromatics. I love to do this in a Dutch oven so that I can go straight from sautéing on the stovetop to baking in the oven. If you don’t have one, you can sauté the aromatics and toast the spices and rice in a skillet first. Then simply transfer everything to a baking dish with a lid (I love this glass one), add the liquids, and bake. Whatever vessel you choose, the first step is to let some plant butter get sizzling hot. My favorite kind of butter to use is cultured vegan butter but you could also use your favorite variety or even olive oil if that’s all you have. Then you sauté the shallots, garlic, and chilies until just soft and fragrant.
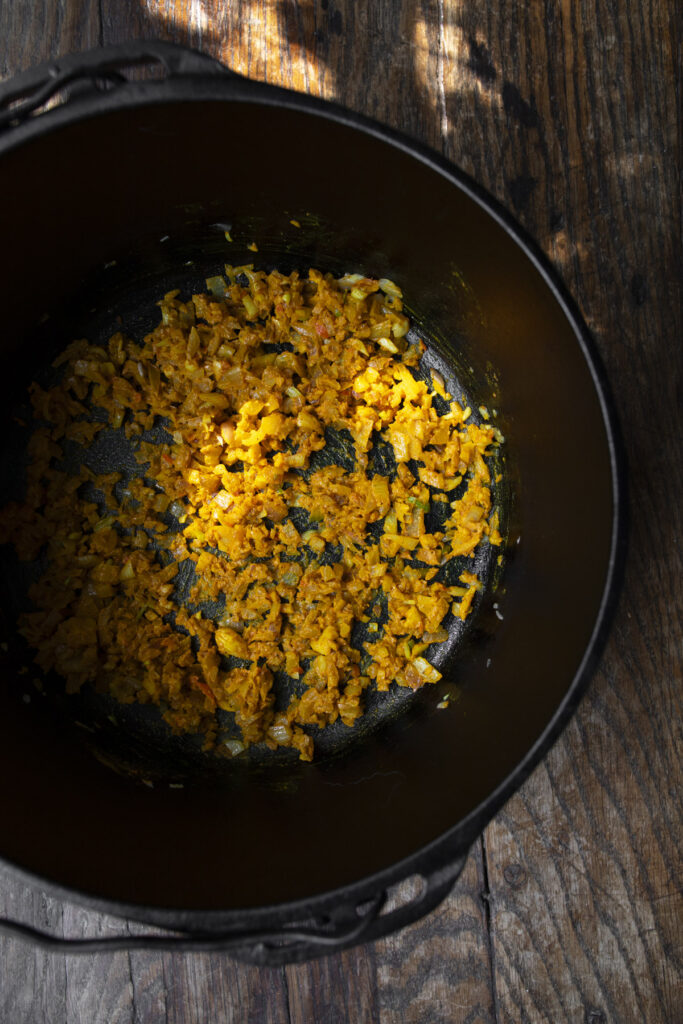
TOASTING THE RICE
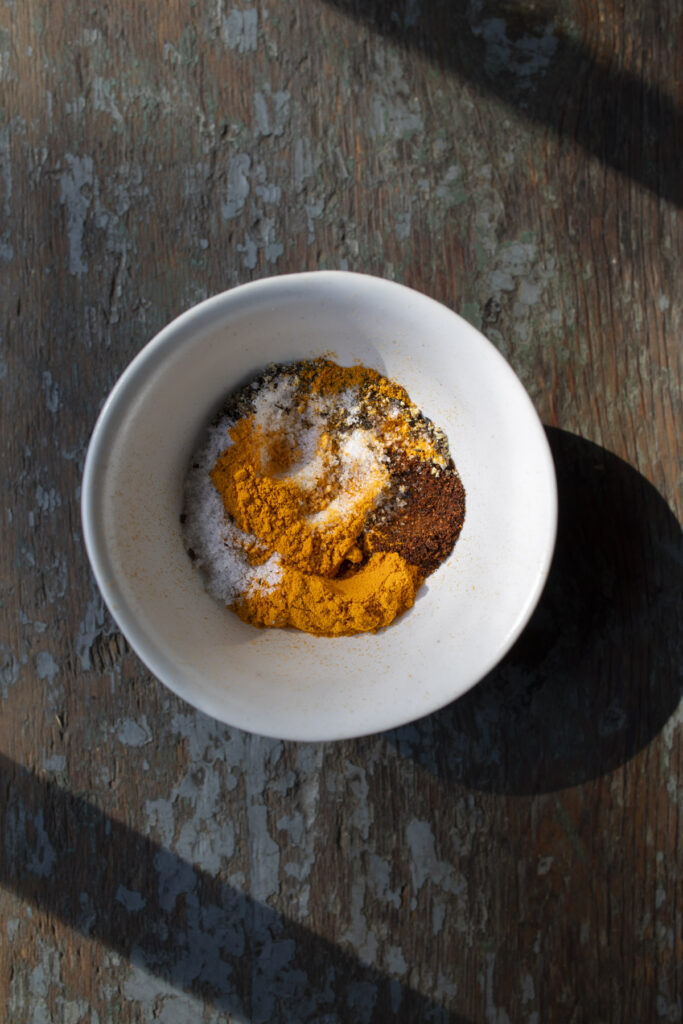
After the aromatics are nice and soft, you add a mixture of turmeric, salt, black pepper, and chile powder. It’s important to use a lot of freshly cracked black pepper here to enjoy the full nutritional benefits of the turmeric. Toast the spices for an additional minute to really bloom all their essential oils, then add the rice to toast as well. Toasting rice is an age-old technique that gives rice a nutty, rich flavor and also helps prevent the rice from becoming mushy.

BAKE, COVER, AND VOILÀ!
Once everything is toasty, you simply add water, rice vinegar, and bay leaves and bake for 30 minutes. This recipe bakes best alone in the oven. As always, depending on your oven, you can test the rice after 30 minutes to see if it’s done. If it needs a little more time, simply pop it back in for about 5 minutes. Once the rice is tender, fluff it with a fork, crack the lid, and let it steam until you’re ready to enjoy. And there you go, easy baked yellow rice!
If you do make this, please leave a comment and a rating below as this greatly helps my recipes to be seen! And if you share it on social media please tag me, I love to see it! I can’t wait to hear what you all think of this recipe. Happy cooking, y’all!
–Timothy
2 cups white basmati rice Prepare the oven and rinse the rice: Place a rack in the center of the oven and preheat it to 450°F (232°C). Then rinse the rice thoroughly in a fine mesh strainer until the water runs almost clear. Set aside to drain while you prepare your aromatics. Sauté the aromatics and toast the rice: Place a Dutch oven over medium-high heat and add the butter or oil. Note: If you don’t have an oven-safe pot with a lid, you can sauté this in a skillet and transfer it to a baking dish once everything’s toasted. Once the butter is melted and sizzling, add the minced shallots, garlic, and chili(s) (if using), along with a pinch of salt. Cook for 3 minutes, stirring every so often, until the shallots have softened. Reduce the heat to medium and add the turmeric, 1 teaspoon of salt, black pepper, and chipotle or chili powder. Toast for a minute, stirring frequently, then add the rinsed rice, and cook for an additional 3 minutes. Turn off the heat, and add the water, rice vinegar, bay leaves, and the remaining teaspoon of salt. Stir to combine. Note: To make a shortcut version, you can replace the shallots and garlic with 1 tablespoon each of onion and garlic powder. You can also skip the toasting step altogether and add 2 tablespoons of melted butter (or olive oil), along with the spices and rinsed rice to a Dutch oven or baking dish with an oven-safe lid. Then stir to combine and bake as directed. You don’t get that toasty flavor, but it is quicker! Bake the rice: Cover the pot (or transfer to a baking dish and cover with a lid or foil) and bake for 30 minutes. After baking, remove it and taste some rice for doneness. If it’s not fully tender, replace the cover and continue to bake for another 5 minutes. Once tender, remove from the oven and gently fluff the rice with a fork. Crack the lid on the rice and let it steam until you’re ready to eat. Enjoy! I love the bold turmeric flavor you get from using a full tablespoon, but it could be overpowering if you aren’t used to it. I recommend trying this dish with 1 or 2 teaspoons first, and adding more as you become accustomed to the flavor.

Ingredients
2 tablespoons cultured vegan butter or olive oil
1 medium shallot, minced
2 fat garlic cloves, minced
1-2 small hot chilis, minced (optional)
1 tablespoon ground turmeric (less if desired)
2 teaspoons sea salt, divided
½ teaspoon freshly cracked black pepper
¼ teaspoon chipotle or chili powder
2 ½ cups filtered or spring water
2 tablespoons rice vinegar
3 bay leaves (fresh or dried)Instructions
notes
This rice keeps beautifully in the fridge. I always make a big batch so that during the week, I can make fried rice with it using whatever vegetables and herbs I have.
13 comments
This looks delicious. I’ll be making this tomorrow & report back! Thanks for the recipe😋
I hope you love it!!
do I need to adjust any timing if it’s another rice? I think I have brown jasmine at the moment.
Brown jasmine will take about 15 minutes longer (sometimes 20)! If you give it a taste and the rice is still hard, simply place the lid (or foil) back on top and continue to bake for an additional 5 minutes as needed until tender. Brown rice varieties do take longer but they still work! Also, every oven is different, too, but you can eventually find a sweet spot with the timing.
This was very tasty! Thank you.
Lovely to hear! Thank you!
I just finished making this, it’s delicious. I halved the recipe, because I’m the only one eating it. It has a nice spiciness, but was a little too dry when finished, so I added a little more hot water which made it perfect. Thank you!
Suzanne
Happy to hear this! Thanks for letting me know!
Thank you so much for this versatile and delicious recipe. I’ve made it twice, exactly as written. The flavor and texture of the rice is wonderful and paired equally as well with burritos as it did with roasted cauliflower and Dahl.
Hi Jennifer! That it so lovely to hear! Thank you for letting me know.
Made this today and it was very good!, however, it was a little on the dry side, ( probably cooked a little too long) , I added a little more hot water which helped. I halved the recipe since it was just me eating and was able to freeze leftovers for another time.
Is this the same yellow rice from the Chicken and Yellow Rice post?
Yes!